Doing Simple Straw Bale Construction Tasks
Some of the questions we’re asked almost every week pertain to details of people’s individual projects. How do I build this or manage that wall connection, etc…?
On the other hand, many of the questions focus on the small stuff within straw bale construction. Where do I find bales? How do I know if the bales in my area are any good? What’s the best way to re-tie a bale or sew a wall?
The answers to these questions are all relatively simple; however, enough people have the same questions, so it seems appropriate to dedicate an article to them! Here we go!
Finding Straw Bales
Finding bales may be one of the most important aspects of building with straw. It may well be the first important decision you make along the road to your new home.
The first things to look for when selecting bales are the color, the density, and the moisture content. We don’t bother much with the question about whether to use two or three-string bales. In most climates, two-string bales are more than enough to create a super-efficient wall system, although they are getting harder to find in some locations.
To source bales, look in a local agricultural newspaper, visit a farm supply store, or contact farmers directly. Sometimes, placing an ad in the paper can be successful, too. You can also click here to learn about bale brokers that have been successful in sourcing bales for construction projects across the United States.
BALE QUALITY
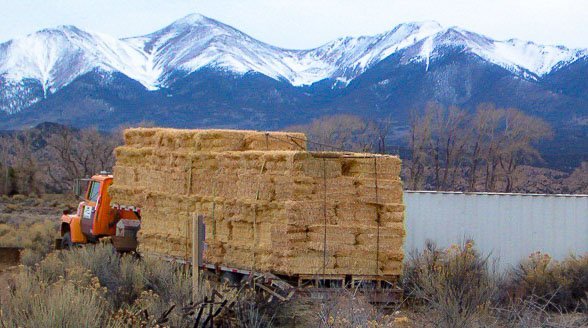
When you approach a field or stack of straw, the first thing you should do is look at the color of the bales. The straw should be golden and not show signs of weathering. Any areas of dull brown or black straw indicate the bales, or even the pre-baled straw, may have seen some weather and may not be suitable for building.
When considering rice bales, the color is more of a pale green, so don’t be surprised if you don’t find that golden straw we refer to above.
MOISTURE CONTENT
Once you have convinced yourself that the color is correct, you will want to check the moisture content of the bales randomly. The easiest way to do this is to use a bale moisture meter and randomly select a dozen or so bales to check.
In general, newly baled straw will be within the tolerance you need to build with because the farmer does not want moldy bales either. We suggest around 8-12% MC. According to Straw Bale Appendix of the International Residential Code (IRC), the bales shall not exceed 20% moisture content when measured prior to the application of plaster. We prefer to stay as far away from 20% as we can.
BALE DENSITY
Bale density is important, especially in load-bearing structures. Appendix S requires a dry density of 6.5 pounds per cubic foot. The key here is that we measure dry density. In other words, we have to remove the weight of the moisture within the bale that was determined in the last step. It’s a fairly complicated but manageable process.
If we know the bales have a 10% moisture content and our bales weigh 45 pounds, then 10% of 45 equals 4.5 or 4 ½ pounds of water within the bale. Subtract 4.5 from 45 and we have the dry weight of the bale, 40.5 pounds. To calculate the dry density of the bale, divide the calculated dry weight of the bale by the volume of the bale. The volume of the bale is equal to the width x height x length in feet. For a bale 18″ x 14″ x 36″, the volume equals 5.25 cubic feet. So, 40.5 divided by 5.25 = 7.71 pounds/cubic foot.
An easier, less scientific method is to lift the bale by the strings. There should be no more than about 5 inches of slack in the strings, and the bales should not deform. Wasn’t that easier?
RE-TYING BALES
Some of the simple tasks within straw bale construction are the most important for a successful project. For example, knowing how to re-tie a bale may seem simple, but if your knots are not strong, your entire wall will sag under its own weight.
We use a Bale Knot to retie our bales and to sew the mesh to the walls. It’s a super strong knot and can tighten most bales more than the original knots from the baling machine! Plus, once you get the hang of it, they are incredibly fast to use.
It’s hard to describe in writing and is most definitely best learned hands-on. We do have a video that shows the process, but we find that most people think it’s much easier to learn hands-on at the workshops. Be sure you put a lot of tension on your ties. If you pull too hard, you’ll snap the twine. If that happens, you’re on the right track, pull a little less next time! We find that using body weight to compress the bales while pulling slack out of the line at the same time is very effective.
Straw Bale Construction Tool
This custom straw bale needle makes baling so much faster!
Use the same knot for sewing walls as you did for bale resizing. The Bale Knot is one of the fastest and strongest knots we know and is perfect for this use.
Quality tools are a must as well. Simple baling needles fashioned from thin steel will work, but your hands will get sore, and your time will be spent trying to use them efficiently.
We use a sturdy handled bale needle with a specific nose design which allows us to quickly install the twine while retying bales. The keys are the notches and the filed point. This and some other simple tools speed up our re-tying process a lot.
CONCLUSION
The small stuff in straw bale construction has a tendency to add up to a lot of time. If you plan ahead for that time spent, your project timeline will be more manageable.
Don’t expect to bale, lath, plaster prep, and plaster all in a weekend. You’ll end up way behind schedule and pretty stressed out! Use the right materials, choose the right tools, take care of yourself by drinking a lot of water and taking adequate breaks, and try to work in the shade when you can.
This will all help to create a happy environment for you to build your dream and know that your dream will last over the years.