The same is true for the other major systems of the house: plumbing, electrical, mechanical, and so on. As long as the systems are built properly and they meet or exceed codes, you are all set. What those systems actually look like is mostly irrelevant.
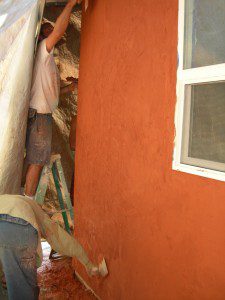
The same cannot be said about plaster. That’s a system that not only has to be structurally sound and function in a way that protects the bales, and ultimately your entire house, but it also has to look good. After all, when have you ever heard someone say “Wow, you really did a great job with the rough plumbing in this house. It sure is beautiful.”? Probably never. How about someone commenting on plaster? Now that’s one that you have likely heard or even uttered yourself. “Man, that plaster looks amazing!” Here are my favorite plaster tips.
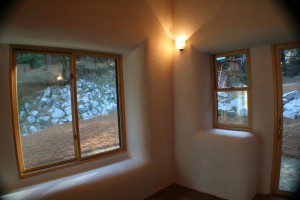
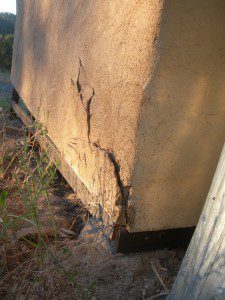
If it’s not enough incentive for you, then consider that weaknesses in the plaster can lead to damaged bales and ultimately, to overall wall system failure. Surely that’s enough to get you fired up.
There are so many details about plastering that must be addressed each and every time you apply it to the wall. Covering all of those details in one blog post will not do them justice. I have covered many of the details in other blog posts, so I’m going to continue that trend by adding another aspect here: the direction of application. Believe it or not, it actually matters how you apply the mud to the wall. There are several reasons.
First, if you apply the mud the wrong way, you will actually change the physical characteristics of the plaster in the process which will weaken it. Secondly, applying the plaster in the right direction will make you more efficient in your task. Let’s take a look at the proper direction of application and how it effects the overall plastering process.
Maintaining the Physical Characteristics of the Plaster
So how to not overwork the plaster? This brings us back to the direction of application. Mud that is applied to the wall should be placed so that it is pushed into any plaster that is already on the wall. For example, if you are working from the top of the wall down, then you would apply the mud to the top edge of the wall, cutting it into the ceiling, soffit, or rafters.
Once placed, your next application of mud would start about one to two feet below the initial placement (depending on how much plaster you apply in one swipe) and would be worked back up into the existing mud. This allows you to join the two sections of plaster together without overworking the material. If you had placed your next trowel full of mud on top of the existing plaster and then pulled it away, you would risk overworking the material.
Efficient Plastering Technique
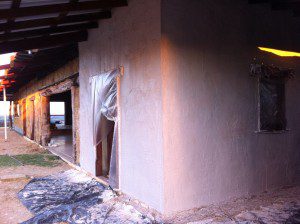
When working from the top down, you also minimize the need to correct drips and plaster falls. Consider that if you plaster the wall from the bottom up and drop plaster off of your hawk or trowel as you move up the wall, it might land on the area you just finished plastering. Now you have to go back and repair an area you just finished. That’s wasted time. Plastering from the top down means you are always working on a fresh wall and there is no chance of damaging plaster you have already placed.
Finally, most of us are right-handed and so will apply the plaster in a stroke from the bottom up and from left to right. Lefties would apply from the bottom up and from right to left. This is the most efficient and comfortable stroke to make. It also lends itself perfectly to applying the mud from fresh bale into plaster when the wall is worked from the top down.
Picture the top three feet of the wall already plastered. As you stand on the ground and apply the next swipe of plaster, you would start roughly two feet below the fresh plaster line. The plaster would then be pressed into the wall and lifted from the bottom up and to the right (or left if you are lefty) in a sweeping motion. The arc of plaster would overlap the line of previously applied plaster just enough to blend the two lines together. In this way, there is no overworking of the plaster and your stroke is simple, consistent, and efficient.
Window Well Headers
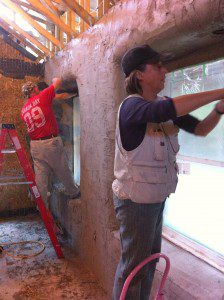
The first ingredient is an adequate substrate. You cannot ask plaster to hang upside down without providing it something to hang on to. I like to use either a self-furring plaster lath, one that has dimples in it to hold it off of the wall surface, or a combination of welded wire mesh and standard plaster lath. In the latter scenario, I place the welded wire mesh onto the window well head first and then cover it with plaster lath. This gives a little separation between the window well head and the plaster lath and allows the plaster to attach more easily. Be sure that all materials are stapled firmly to the window well head box (box beam above the window or door) as any movement in the substrate will make it harder to keep the plaster from falling off.
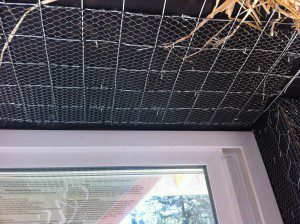
Work from the sides towards the middle of the well head applying only a thin layer of plaster. Be sure to press it fully into the plaster lath so that it can hold onto something. The key is not to apply it too thick. The thicker it is, the heavier it is. Instead, apply a thin layer across the entire well head and then come back a few minutes later and apply a thicker layer on top. Typically the time it takes to place a thin layer across the well is enough to turn around and start at the beginning again adding the second layer. Be sure to work from the edges in once again.
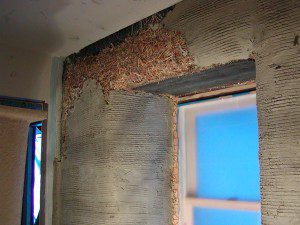
After it has had a chance to set up, I come back and smooth the entire curve out, making sure the plaster is well seated into the straw. It’s really important that you not create suction with your trowel when working these areas as that will pull the mud right off of the wall. Be sure to keep the leading edge of the trowel (the one towards the direction you are moving) slightly elevated off of the wall surface. This allows you to smooth the wall but breaks any potential suction.


14 Responses
Once again an excellent article Andrew!
Thanks Dale!
Andrew, great article. Two things: as a lefty I imagined troweling the mud on and found myself moving left to right anyway.
All Universal healing is done in a clockwise vortex, similar to a tornado. Healthy energy flows clockwise so I am wondering if it might be better, Universally, to apply in a clockwise manner, when possible, regardless of your dominant hand…just a thought. There is so much we don’t yet know about our Spiritual selves and the Spirit within our homes.
Keep up the good work.
Al
Good point Al. I’m glad you see the home construction as part of the bigger picture and how all of the energy that goes into the home becomes a part of it. The idea of applying it right to left for a lefty is that the hand positioning when properly using a hawk and trowel makes it difficult to go the other direction and still be efficient in your application time. Perhaps time is not as important as energy and that is something each person will need to decide. Thanks for the remembering…
Makes me want to build a house NOW.
Is there an article on estimating plaster? Like the amount of materials needed that would be typically used on an average straw bale project.
Every wall is different, but you can see some basic guidelines on how to calculate lime plaster consumption in this link.
Thanks for the tips on taking care of plaster. A large portion of the home we are building is plaster, and I want to make sure I know how to keep it looking good. Thanks for mentioning to push new plaster into the plaster that is already on the wall. I didn’t realize not doing this could cause separation. I will make sure to keep this in mind.
When you see a person plastering a wall or anything, you can never guess how technical the work is. Plastering will not be considered a hard job but to the contrary of it, it is hard and requires a lot of patience in the process.
So true. It’s quite an art for sure (and a science). What’s more, it not only protects everything you do underneath it (bales, framing, electrical, etc.) but it’s also what people see when they look at your house. Nobody ever says “wow, your rough plumbing work looks amazing” when they come to visit your finished home! 😉
Recently I have been thinking about getting a plastering contractor to come to look at my home and I wanted to look up some information. I really appreciated how this article talked about how applying plaster in the wrong direction can actually change its physical properties. This is something that I never knew and ill have to make sure to find a contractor who is knowledgeable.
Good luck! I hope you find the right people to help you.
Hi Andrew, hope you guys are well! Thanks for the great article. I’m about to embark on plastering a strawbale wall and this was super helpful. I was wondering what you think about using hemp cloth (possibly dipped into clay slip) over the straw bales before plastering? And PS… the documentary I made about small hand built homes and the building codes – in which you played a major role – is just about to hit 525 000 views. When I made it, I never dreamed it would be so popular: https://youtu.be/aDHE3WnBQr0
So cool about the documentary Cari! That’s fantastic. I am a welded wire mesh fan, so that is always my default choice. That said, I can see the hemp working well, so it’s worth a shot. Ive tried just about everything (jute netting, plastic netting, welded wire, chicken wire, no mesh, burlap bags, etc. Each has its advantages and disadvantages.