Straw Bale Structures in High Rain Environments
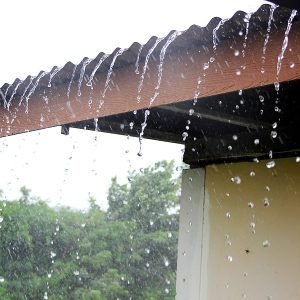
If you live in an area where rain, and lots of it, is the norm, you will need to make some adjustments to the detailing of your building to ensure that water damage is never an issue. As you may already know, moisture in the form of rain, vapor, and/or humidity is the biggest enemy of straw bale construction. The good news is that some simple detailing can help protect your home from these dangers.


Roof Design

The best way to protect your structure from rain is to design adequate roof overhangs to stop it from hitting the sides of the building. We suggest a minimum of two-foot overhangs for single-story buildings.
In the case of multiple-story homes, you may need to add an additional roofline at each story and/or extend the main roof overhangs to three feet. Your design requirements will depend on how much rain you will likely see and whether it comes as wind-driven rain (horizontal rain) or heavy downpours.
Splash Protection
The next level of protection for buildings in rainy climates comes in the form of splash protection. Water allowed to flow freely off the roof will splash back onto the walls once it hits the ground. There are several ways to protect your structure from rain splash, the most common of which are outlined here:
-
The use of gutters and downspouts can direct water away from the structure and into a swale system for irrigation use, a drainage system as required by code, onto the ground in a way that disperses the water or into a catchment system for collection and later use. Areas with high snow fall may run into difficulties with gutters being torn from the structure and so additional details may be required in those locations.
-
The bales can be framed up off of the ground by a few feet on a pony wall assembly so that any splash will hit a wall section that is void of bales. Very often, such areas are covered with an accent siding such as stone, metal, or other traditional siding materials. Be sure to install a proper flashing (water table) at the transition from the accent material to the plaster/bales.
The space created underneath the bales in this framed up option is perfect for easily running utilities. Once all utilities are installed, simply insulate the space and cover both sides with plywood, felt and plaster lath (if plastering) or other pre-siding required materials. Once plastered (typically the finish on the interior regardless of what siding choices are made, the pony wall assembly will be invisible to the eye.
-
Proper landscaping can be used to dissipate falling water as it reaches ground level. By placing shrubs and other hearty plants in the eave drip line, water is disrupted on its way down and does not splash with the impact it would have if unencumbered.
Leaks...
A detail often overlooked when building a straw bale house is the placement of waterproofing material on top of the bale wall, just below the roof framing. The idea behind waterproofing this area is that if the roof ever leaks, the water will run down the rafters and into the bales from above. With the waterproof membrane in place, the water cannot enter the bales; instead, it will be directed away from the bales and into the plaster.
When it hits the plaster, a wet mark eventually alerts you of the leak, at which point you can begin the investigation. Without such warning, the sponge-like bales absorb the water until it is too late, and the damage is done.
The most common leak in any home, straw bale or not, is around the wall openings: windows and doors. Proper flashing details are a must in any home and perhaps even more so in a straw bale home. If the appropriate counter flashing and flashing are not installed, leaks may find their way into the building and saturate the bales.
With proper flashing of the openings, water that manages to make it past your first line of defense will have to navigate through a series of waterproof membranes before it can reach the bales.

Humidity

Humidity is a form of moisture that is much harder to design out than rain. Whereas rain can be handled with the details outlined above, humidity pervades everything and is not easily controlled or managed. The best defense against humidity comes in two details that should always be implemented together.
The first is a naturally hygroscopic plaster. This means a plaster that will absorb and release excess moisture naturally. The two best options for this are lime plaster and earthen plaster. It is crucial to choose a plaster that fits your climate and environment. For example, earthen plasters are amazing at moderating excess moisture; however, they are not very durable in an exterior application. Our personal preference is to use lime plaster as it is both durable and hygroscopic.
The second form of defense is the use of an Energy Recovery Ventilator (ERV), which will draw excess moisture from the house, condense it, and drain it to the exterior. These systems also provide a constant supply of fresh air while maintaining the efficiency of the home.
They use a heat-exchanging coil system to condition the air they replace, drawing fresh air into the home while expelling stale indoor air to the exterior. This is an excellent system for any home and one we recommend.
With attention to detail and proper construction techniques, along with a quality defense against water and/or moisture infiltration in the form of counter-flashing, flashing, waterproof membranes, roof overhangs, splash protection, and mechanical systems, you should never have trouble with damaged bales due to moisture.

Tomorrow we will show you how to patch holes and gaps in your straw bale walls during the baling process.
In support,
Timbo & Team StrawBale.com