Electrical Details in Straw Bale Walls
Running electrical service lines in a straw bale house differs from installing electrical work in a conventional house. Remember that all of the wiring will be buried in the walls behind your beautiful finish plaster, so you want to get it right the first time.
Pre-Concrete Slab Floor Pour
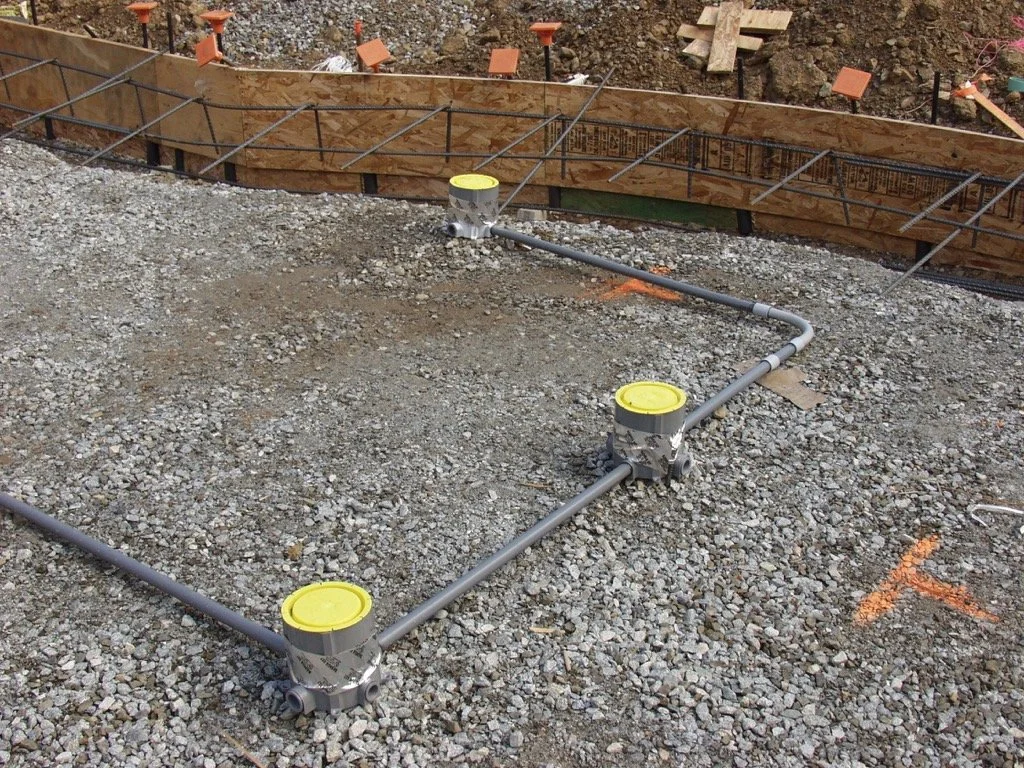
Timing is everything in construction. If you call for a subcontractor and are not ready for them when they arrive, you will quickly find yourself at the bottom of their “return call” list. Your electrician will have to make a number of visits to the house, especially if you pour a concrete slab floor. In that case, they will need to rough in their work after the forms are up but before the concrete is poured.
Post-Slab Pour, or Rough-In Stage
After the rough-in below the slab, the electricians will need to return and finish the rough-in above the slab. For this, the house needs to be “dried in,” in other words, the roof needs to be on and the windows and doors installed. Unlike conventional construction, where the electrical wiring is installed before the insulation, do not call the electricians without having the bales in place.
The wiring is best installed directly in the bales after they have been stacked, tamped, and trimmed but before they have been meshed. If you plan on creating niches in the face of the bales, it is good practice to cut those in before the electricians run their wires.
If you are on a tight schedule and cannot complete the niche prior to the electrician’s arrival, spray paint the niche locations on the bales, so the electricians know to avoid those areas with the wires. It’s also a good idea to use paint to predetermine wire and appliance locations to simplify their installation.

Anchoring Electrical Boxes
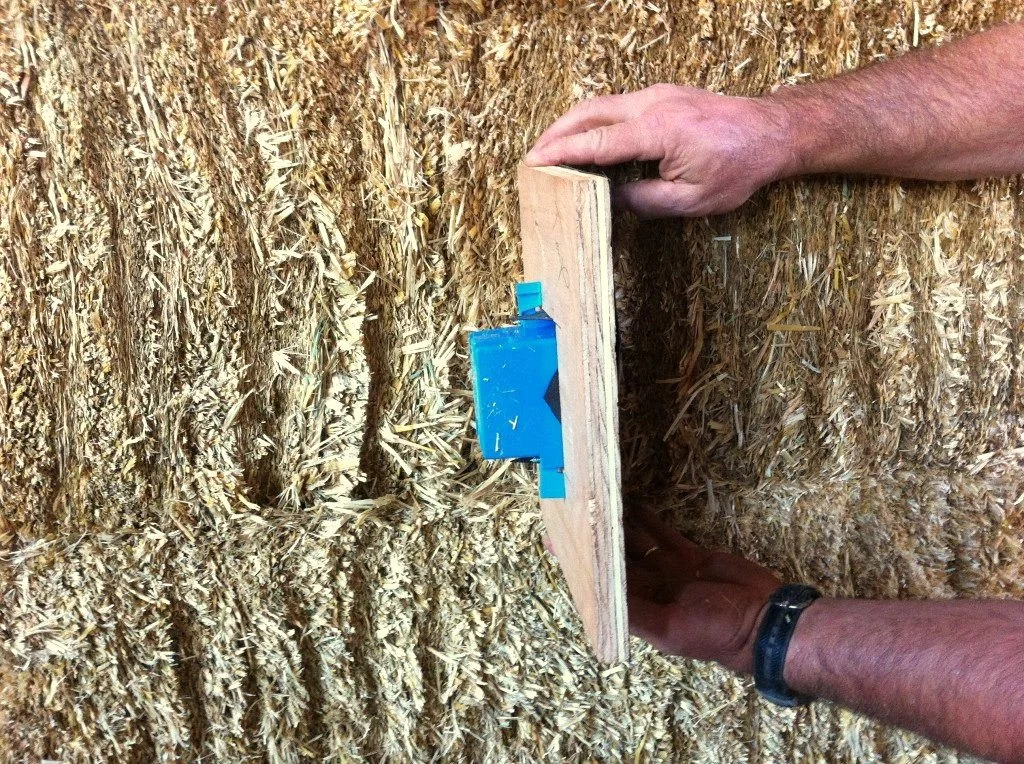
Anchoring the electrical boxes to the bale walls is essential and relatively simple. If the boxes are not adequately anchored in place, they may twist out of plumb during the application of plaster. Once the boxes are knocked out of place, and the plaster has hardened around them, they are challenging to fix, and a “homemade” look will pervade throughout the house.
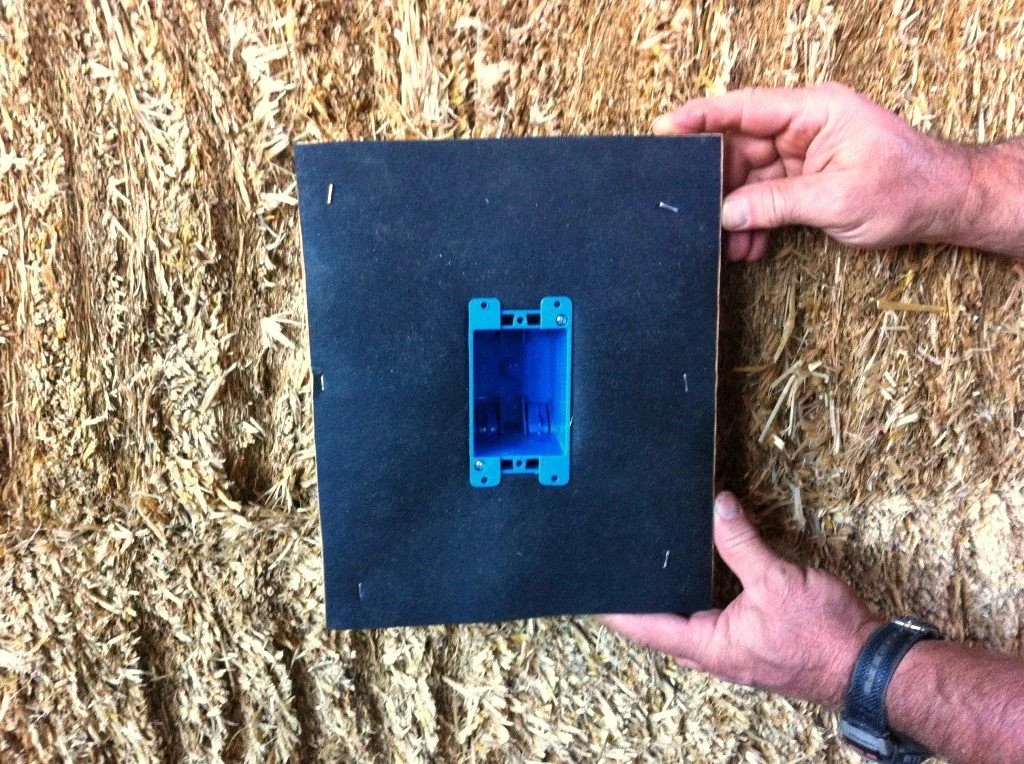
For years, electrical boxes were anchored to the bales with wood spikes; however, we now use plywood plates for a faster, safer, and easier installation, as shown in the pictures below. Note the plywood is covered with roofing felt to protect the plaster and is then stapled to the mesh, which locks it into place.
Finally, a layer of plaster lath is installed to support the plaster over the span of the plate.

Future Proofing Tips
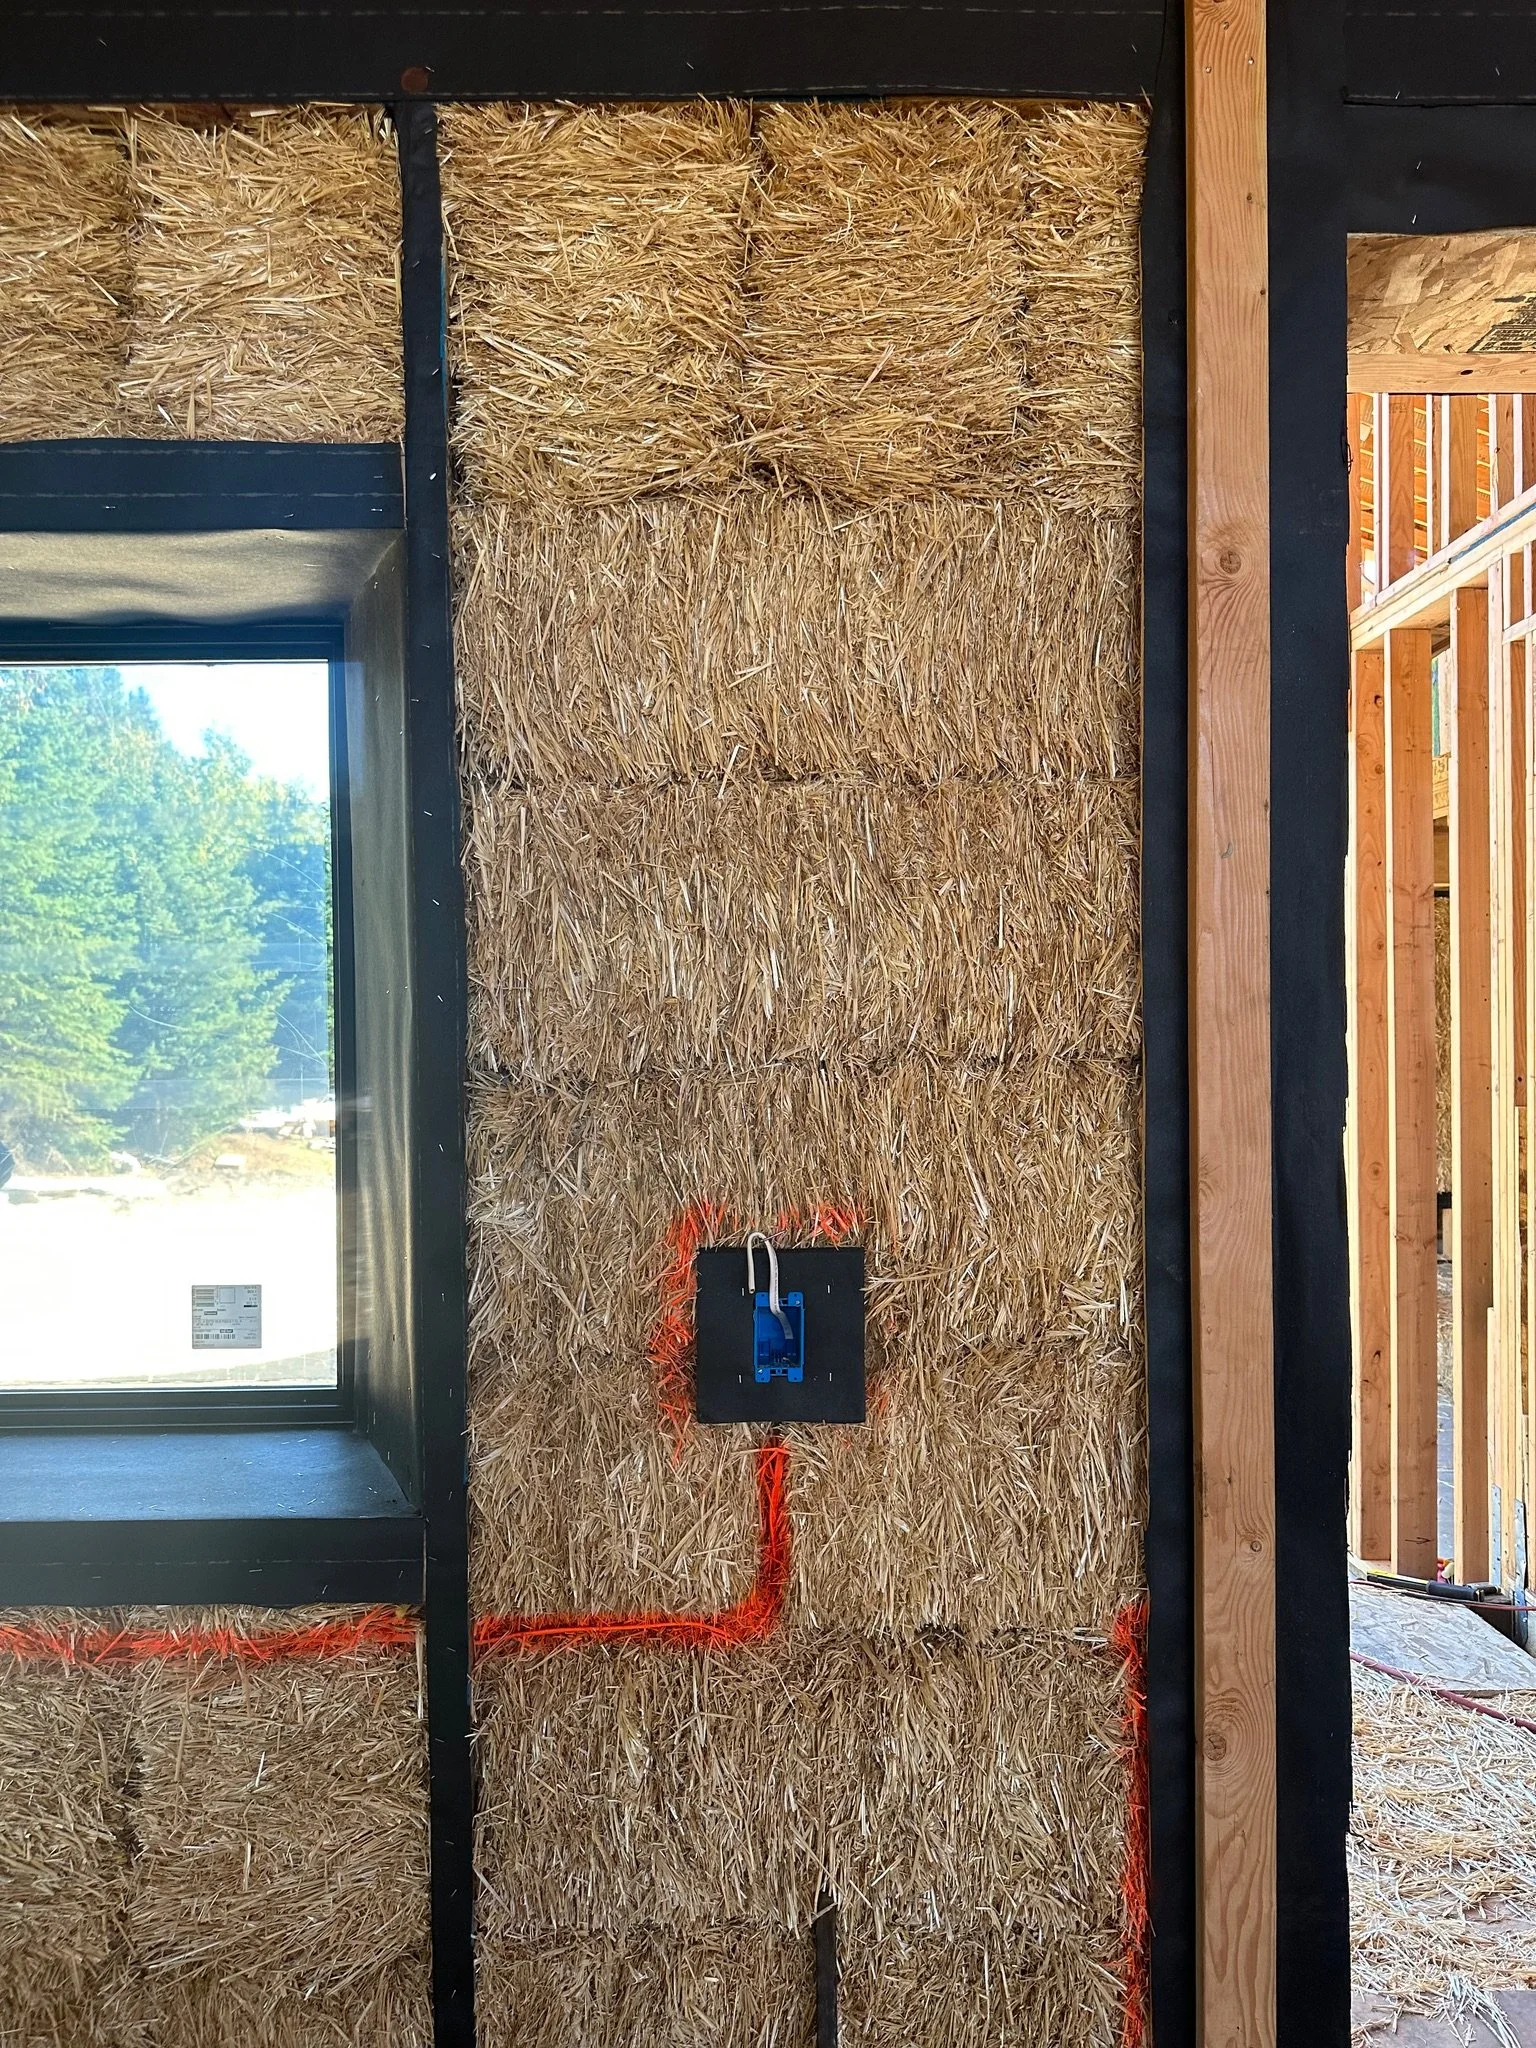
We strongly recommend that once you have completed your electrical work and are ready to plaster, you mark out the electrical runs with bright paint and then photograph each wall. This will give you a clear map of electrical wire locations should you ever decide to cut into the wall or alter it in the future.
One final note, as you can see from the spray-painted lines on this wall section, it is important to run your electrical lines vertically and horizontally and in no other direction. Do not angle lines to make a run shorter.
It may look evident while the wall is not plastered; however, as soon as the wires are hidden, it is really good to know that all of your wiring is running in one of two possible directions. This keeps future owners and electricians much safer should they engage in renovations or alterations to the walls, as standard practice is to run wires vertically or horizontally.
Tomorrow, we will touch on the expansive and exciting topic of plastering your straw bale house.
Bale on!
Timbo & Team StrawBale.com