Framing Considerations for Strawbale Construction
Straw bale buildings are not the same as conventional buildings. This is an advantage and is precisely why we build them; however, we have heard of people trying to create conventional frames and then simply adding the bales in, as if framing specifically to the needs of the bale structure is somehow too difficult. These people try to convince us that it will save time to build the home conventionally and simply use the bales as insulation. Invariably, this does not work well.
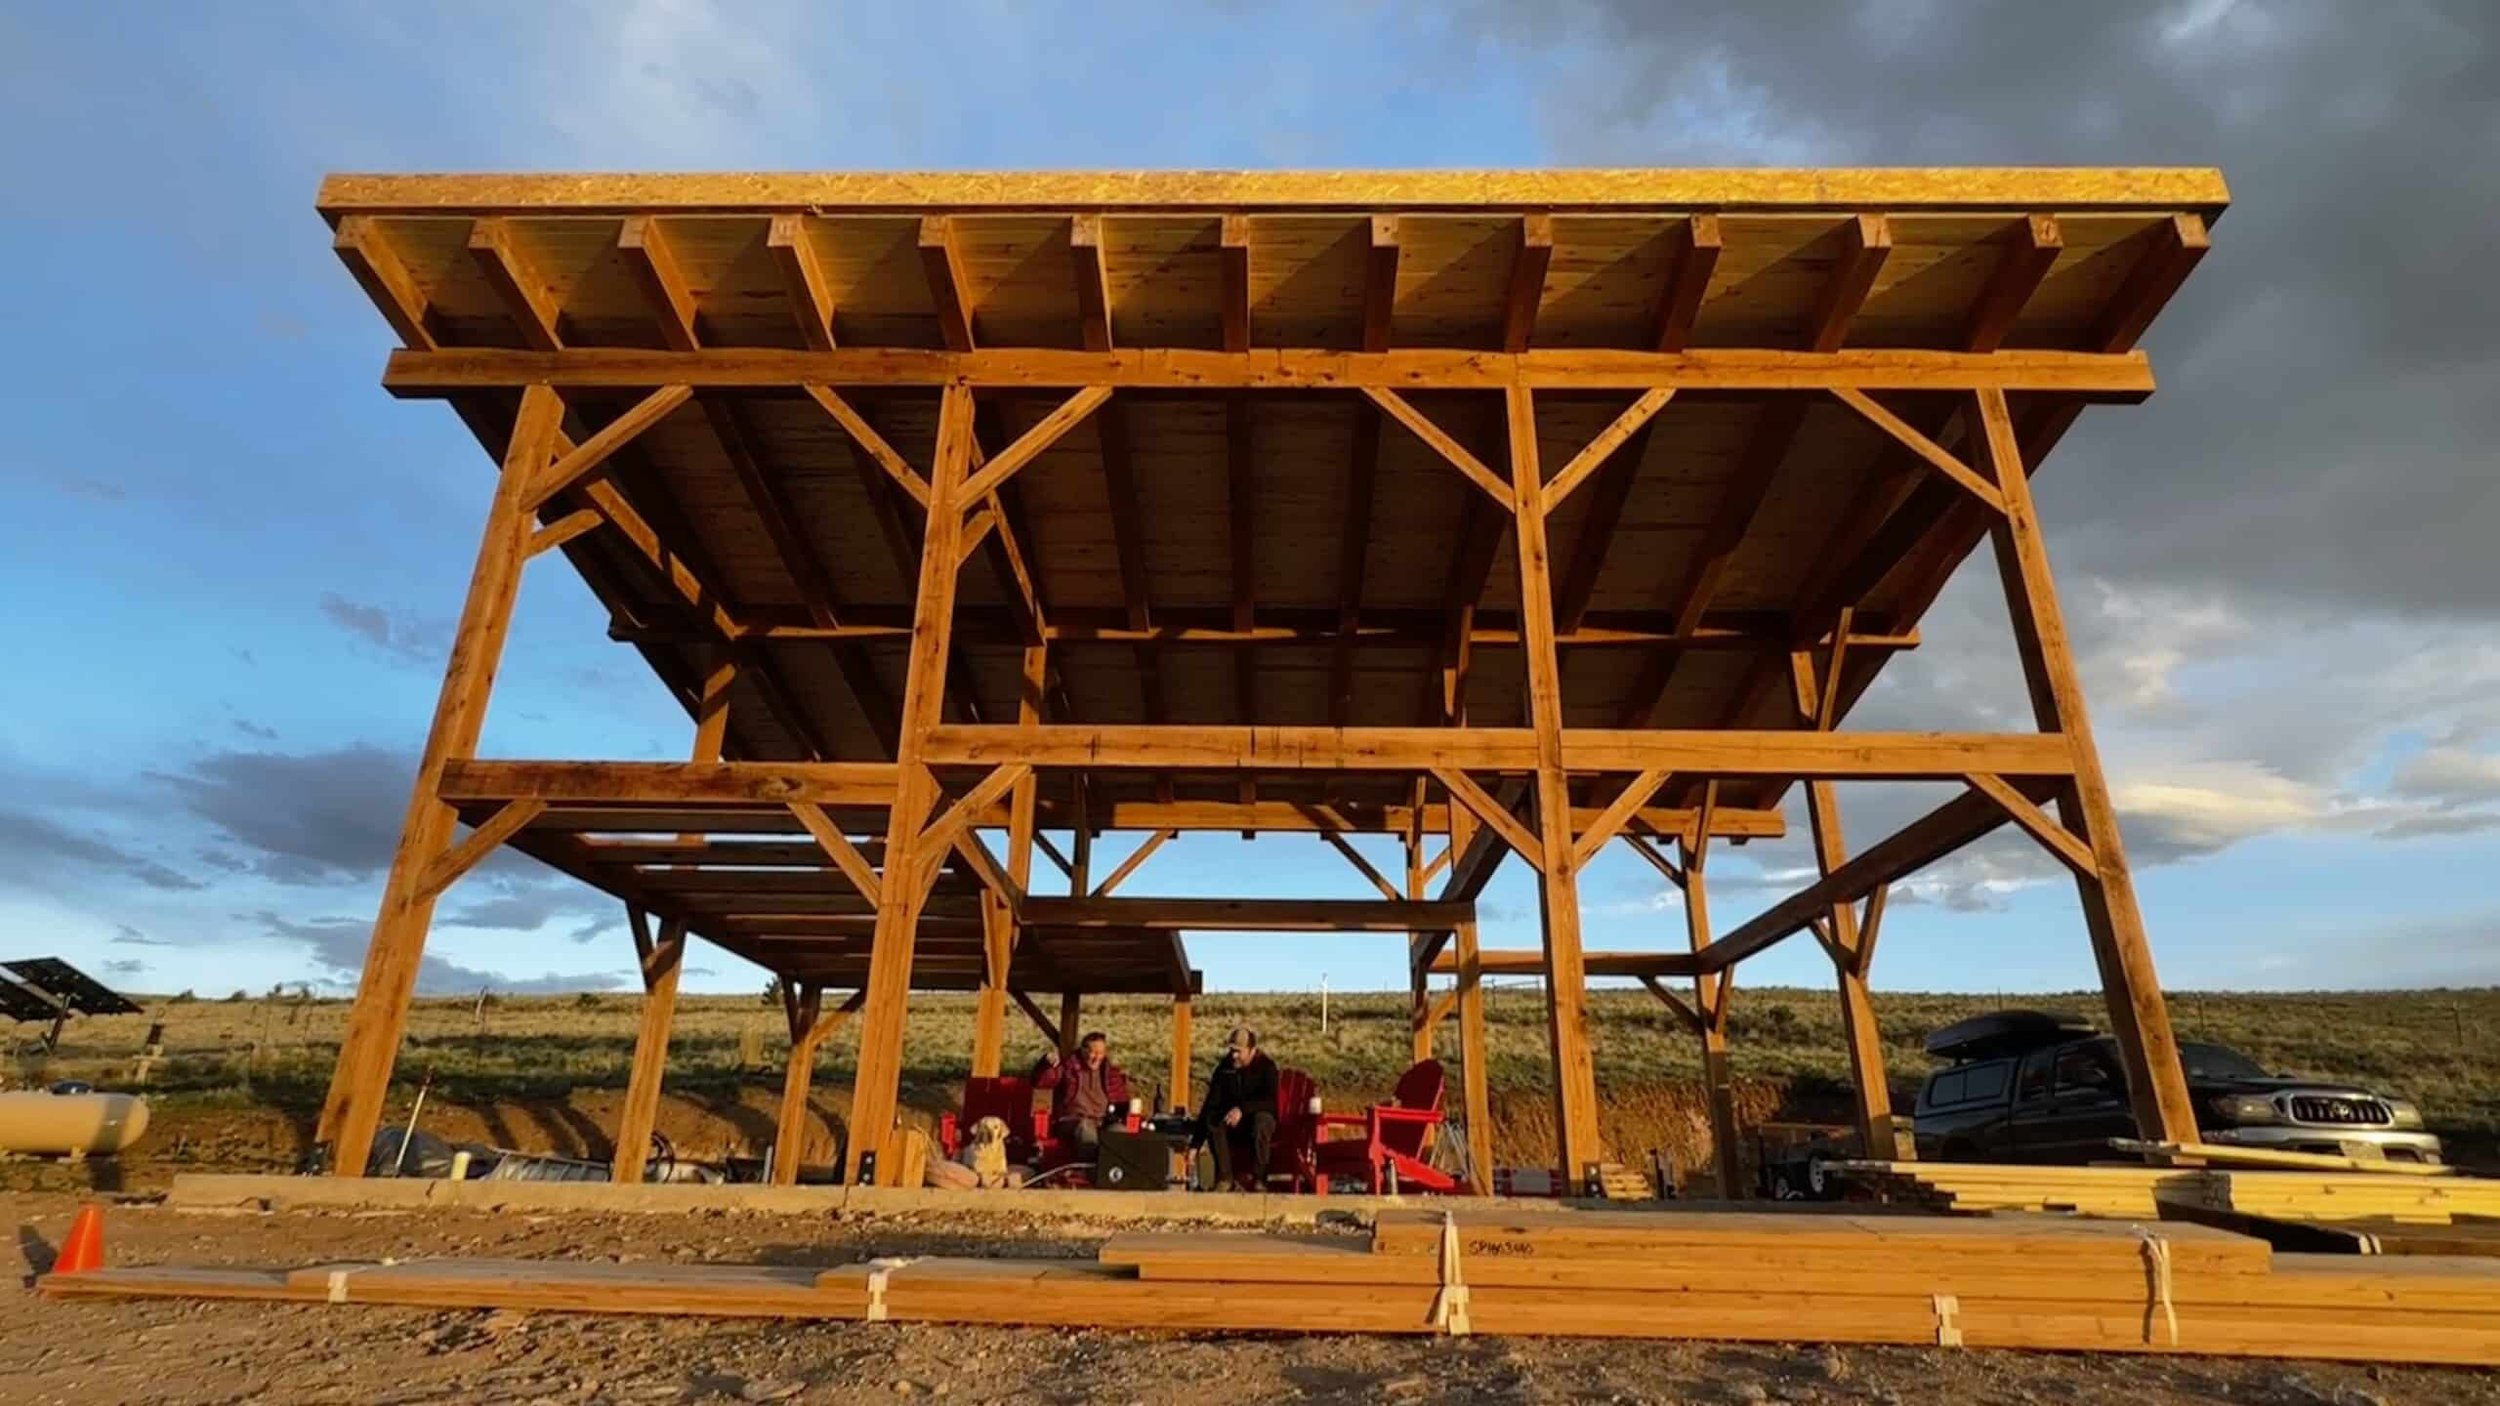
The best thing to do is use a system that works with the bales you have on site. For most non-loadbearing homes, this is either a post-and-beam, modified buck-and-box beam frame, or a timber frame structure.
The frame of the home plays several essential roles. In non-loadbearing construction, it is the structural strength of the home. It provides a load path for the roof and floor systems. It plays a role in the lateral shear strength of the building. In all, it is the system that creates the house’s structural integrity. That said, the bales themselves play a large role in the strength of the structure, too; however, most engineers are only now learning to give appropriate values to the strength of the bales as part of the system, and as such, the frame is often considered to be the structural system.
Post & Beam Systems

We recognize this is a somewhat ambiguous name: post and beam systems. This could mean one of many things, including steel framing, light frame post and beam structures, heavy timber frames, buck-and-box beam, and more. Exactly what you choose will be up to you and will likely be based on a number of factors.
One way is to build with smaller timbers, 4×4 posts, for example, because there is great flexibility with design while still maintaining excellent strength ratings. When using this system, we tend to keep our posts reasonably close together, typically not more than 6′ apart, to increase the strength of the wall as a system. Remember that unsupported bale wall runs tend to get wobbly if not reinforced.
The frame allows us to keep those wall sections tight and strong. Furthermore, the smaller timber sizes allow less expensive wood to be used throughout the home. An 8×8 is far more expensive than a 4×4, and those costs add up over the square footage of a home.
Traditional Timber Frame
Another popular framing system is an exposed timber frame with straw bale wall wrap. Although this system is more expensive than a standard post-and-beam frame, it adds significant architectural detail and beauty to the home and is worth the added investment to many.
The biggest challenge with an exposed timber frame, typically exposed to the interior, is attaching the frame to the bales. In standard post-and-beam construction, the bales encapsulate the frame; however, that is not the case with an exposed timber frame. As a result of this variation, some special detailing needs to be included in the construction process, but it is certainly accomplishable, and the look is spectacular when completed.
Making sure that the plaster stays tight at the joint between the timber frame and the wall is also important and also requires special attention. This is important for two main reasons.
1) The house will look better if all those joints are tight and cleanly finished.
2) An open joint at the unions of frame and plaster (and there are many) would allow air movement and moisture in the form of vapor to enter the walls. This reduces the efficiency of the structure and increases the risk of water damage to the bales.
Special Considerations
To accommodate the engineering requirements associated with straw bale construction, the frame is different from a conventional home in a number of ways.
First, there must be enough room for adequate nailing of the lateral shear welded wire mesh around all the doors and windows. To accommodate this, an additional trimmer may be required depending on the inclusion of exterior trim.
In addition, there needs to be enough nailing surface along both the top and the base of the wall for the welded wire mesh. For that reason, we use pressure-treated (or other code-approved material) 4×4’s for both toe-ups and mud sills. The 4×4’s are also stronger than 2x material and resist breaking during uplift and lateral stress structural testing.
Knowing that we will be using plaster on the interior and exterior of the building, we like to strengthen the window trimmer details to offset the movement of the wood framing around windows and doors. A little extra detail in these areas can help prevent cracks in the plaster, something that no owner likes to see.
By pinching the header and sill framing members between the trimmer sections, the corners are stronger and able to resist movement during the drying of the lumber in the frame and from any subsequent movement of the structure. Keep in mind that buildings are somewhat alive and do move over time. Give your plaster a good head start by providing proper framing details to support potential stress points fully.
Framing Layout

Unlike conventional construction, the framing does not land on two-foot centers, nor is it laid out in four-foot modules to accommodate plywood sheets. Instead, the layout of the framing is designed to fit the size of the bales and support the calculated loads.
The more accurate you are with framing to the bale sizes, the less notching you will have to do during the baling stage. We like to keep the posts fairly close together, no more than 6′ apart. Your bales, roughly 3′ long, will fit into this layout well; however, expecting the modules to be as exact as they are in conventional construction is a mistake. The bales are likely to be 3′ +/- a few inches, so the placement of the bales will need to be adjusted within the frame.
Paying attention to the plate/beam heights around the house is even more important. The goal is to fit the bales tightly under the top plates to help squeeze the bales and strengthen the wall. We like to frame the plates/beams so they are too short for the stack of bales by about 2-4″.
This means the bales will have to be jammed into place, tightening up the wall. Several tricks, from car jacks to brute strength, can be used to do this, and the outcome is well worth the effort.
Roof Designs
Roof designs do not have to change with straw bale construction; however, some roof designs take more work to incorporate into a bale home. For example, a gable roof design can mean the creation of more custom bales than a hip roof. Filling the triangular space of a gable with long, rectangular bales is not easy, so be sure you want that look enough to justify the extra labor.
Roof designs can also impact the overall feel of the room. For example, by utilizing an open roof design or by including dormers, clearstory windows, and/or skylights, more natural light will flood across the room.
As discussed earlier, the roof overhang is something of concern as well. It is important to have a large enough overhang to protect the walls from weather and summer sun; however, the property’s latitude must be taken into account to ensure that the overhangs are not excessive and thus block out the wanted winter sun. Passive solar design is a great partner for straw bale construction and one worth learning about.

Toe Ups

Part of the framing process involves the creation of toe-ups. Toe-ups are an absolute requirement with straw bale construction. As mentioned, they provide an adequate nailing surface for the welded wire mesh. They also separate the bales from the concrete, creating a strong capillary break and protecting the bales from water damage should a water line or appliance ever break and spread water throughout the house.
The toe-ups are made from pressure-treated 4×4 material, gravel, and roofing felt. They also provide a base for the bale anchors, which connect the bales to the toe-ups, which are, in turn, attached to the concrete. In this way, the entire wall system is anchored to the foundation.
We no longer use rebar impalers as required by many code books, but a series of nails applied to the toe-ups. The nails create a much stronger connection for the bales and do not interrupt the separation of bales from concrete the way a rebar section buried in the concrete does. All the building departments we have worked with have readily accepted the change; however, it may take some education on your part as to why you are straying from the code in this area.
If any of this framing information is beyond your current understanding, don’t worry! More step-by-step details are shown in our “How To Straw Bale Building - Original Video Series’.
To instantly receive 25% off the purchase price, use the coupon code “4UOnDemandCourses” during the checkout process for ANY On-Demand Course in our library.
Tomorrow, we’ll cover making and shaping custom bales.
In support
Timbo & Team