A Full Summary of the New York Straw Bale Workshop

Written By Andrew Morrison
April 22, 2010

straw bale workshop group photo

What an amazing week at the New York straw bale workshop! We called ourselves the “Small but Mighty” and we were indeed that. Even though we only had 13 people in this workshop, we managed to fully bale and partially plaster a roughly 1000 SF, two-story structure in just seven days. Keep in mind, there are lots of lectures going on during those seven days too, so that’s even more impressive in terms of the amount of actual work completed. Here’s a shot of the structure during the workshop. straw bale workshop timber frame As you can see, there’s a lot of baling to do in the gable ends, not to mention the 14′ tall South and North faces of the building.

I should also mention, as a means of tooting the group’s horn again, that the post and beam structure is exposed on the interior and that means extra work in plaster preparation and pre-baling details. I took time each night after we finished working to write down the days progress. I’ll share that with you here so you can get an idea of what we accomplish during the course of a workshop. Now if that isn’t intriguing enough for you to read on, I’ll give you a little more incentive to stay with me here.

There’s a couple pictures and even a video of the after hours parties that you won’t want to miss. By the way, my next workshop in Montana is totally full. Your next opportunity to join me for a week of fun will be June 14-20th in Hico, Texas. Okay, let’s get started looking at the week in review.

straw bale workshop timber frame
Day 1. No bales in place yet.

Hurley, New York Workshop

Day 1:

Today was the first day of the workshop and things went really well. We have the top nailers in place, the nail beds in the toe up assemblies, an isolation wall for the electrical panel built and installed, a bunch of roofing felt covering some exposed wood, as well as all the blood lath cut and installed behind the posts (this is an internal exposed timber frame house and so we need the blood lath in place before we bale to provide for plaster support), and all this with hours of lectures and details about framing, foundations, bale selection and more. It was a very productive day. Tomorrow we’ll start setting bales.

I had to include this picture of me at “the easel” because I promised Morgan, the six year old artist and great helper of the workshop, that I would post some of his artwork. As I was teaching, he would draw what I was talking about and then hand

me his pictures. The first was a bale with a baling needle. It was great and so I hung it up on my plywood easel. He then drew a picture of me standing next to the easel with his picture attached to the plywood. The as I continued to hang his pictures, he continued to draw pictures of me, the easel, and his artwork on the easel. it got pretty deep. Here’s my favorite. Notice how I command the attention of the entire class and how happy everyone is!

Andrew Morrison teaching

Site Orientation
Participant Introduction
Foundation Lecture
Framing Lecture
Plumbing Lecture
Building Site Specific Lecture
Bale Quality Lecture
Nail Beds (20d)
Top Nailers (including gable ends)
Blood Lath Behind Posts

Roofing Felt at Splash Guard

Electrical Panel Isolation Box
Day Summary

child drawing
A Happy Class!
child drawing
Me Teaching My Stuff!

Day 2:

straw bale wall with holes
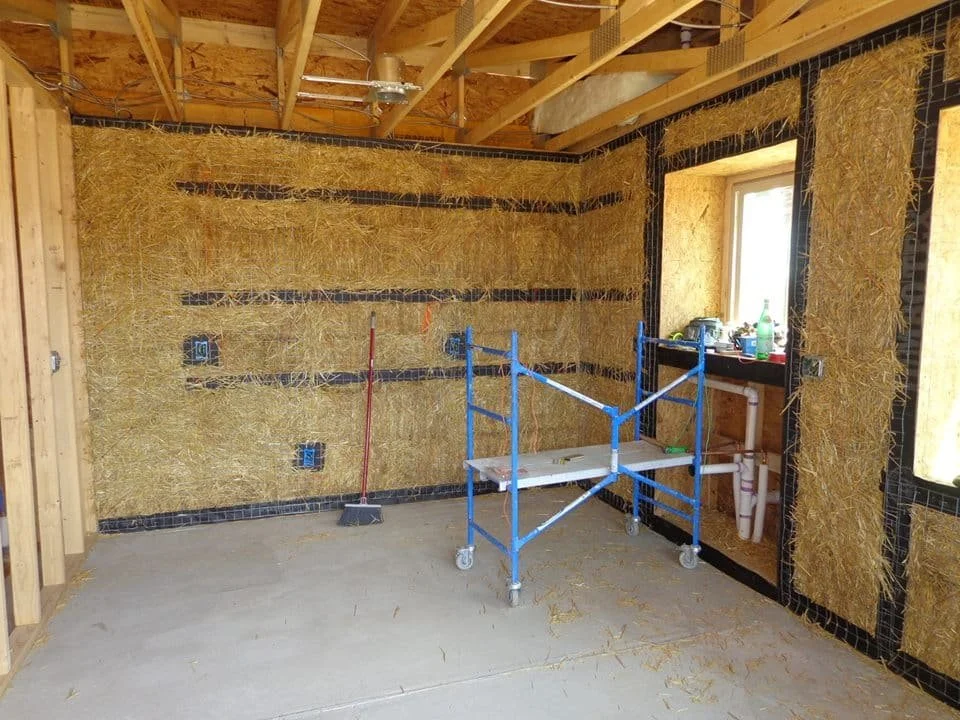
Notice all the gaps…another problem created by bales on edge!

I was really impressed with the crew today as they managed to get roughly 80% of the bales in place. That’s a lot of bales and with no previous experience in the group, represents a lot of hard work and desire to learn. We also managed to build and install the box beams above the first floor windows and doors. Oh, I should mention that the building is a two story “balloon bale” structure with an internal exposed timber frame. This means that the bales go from the ground level to roughly 14′ above grade with no break. That means we had to set up scaffolding and work from that level, which slows everything down.

Let me vent a little if you will. This house was designed to have the bales stacked on edge. When I asked the host why, she said that’s what the guy who designed said was best. I don’t in any way blame the host on this as she was working with a bale “expert” and this was his recommendation. I find this astonishing.

Stacking bales on edge is a pain in the rear end and has no value above and beyond stacking bales on the flat, yet has MANY disadvantages. I don’t understand why people continue to do bale buildings this way. The bales naturally (by the laws of gravity) want to lie on the flat. If you toss a bale in the air, it will land on the flat 95% of the time, at least. Why fight gravity?

The majority of our time was spent trying to stop the bales from tipping over. On top of that, you can’t notch the bales around any framing because the strings are on the interior and exterior faces of the bales. You can’t easily cut a niche into the bales either for the obvious reasons. The corners are weaker because of the instability of the bales. You can’t weed whack the bales to make them smooth. Cutting the electrical wiring into the bales is almost impossible because of the strings. Anchoring cabinetry is very difficult. The [plaster doesn’t want to stick as well. On and on the list goes.

So please, stop designing buildings this way. When I asked the question as to why it was done this way to the entire group of participants, the answer was that less square footage is used this way and so the tax valuation is closer to the actual square footage of the house and thus you pay less in your taxes. That’s a good answer and that’s nuts people. If your house has 1000 SF of usable space but you are taxed for more because of the exterior footprint, talk to your local tax evaluator and MAKE A CHANGE with the system. You should not be taxed for square footage you don’t have just because you chose to build an efficient, natural home.

Okay, that’s out of my system. I’m happy with our efforts today and I think the entire class gets the value of stacking the bales properly! Oh, and one side note, almost everyone learned the Miller’s Knot in the first few hours after I taught it. That almost never happens. A swift bunch for sure!

3 Box Beams
80% Bales Complete
Retying Lecture
Notching Lecture
Miller’s Knot
Tying Bale Corners Together
Day Summary

Day 3:

It’s amazing how long the details take. Today we finished up the baling, so all the bales are in. We also did 5 of the window headers, which look great. On top of that we did some more pick up framing that finished up the window frames and the box beams. That said, we were 80% complete yesterday and only just now finished up the bale stacking. All the detail work really slows things down, as does working up high, off of scaffolding and/or ladders.

The Electrical spike jig is the coolest thing ever! Here’s a shot of it. It makes the production of electrical spikes an breeze, no kidding.I can’t wait to use it tomorrow!!!

electrical spike jig
Scrap lumber for sure, but a MUST for safe creation of spikes.

Not only did we have a full on roller skating party in the hosts’ basement tonight, 80s music, velvet ropes, PacMan and all, but I got to watch the Red Wings in the first round of the Stanley Cup Playoffs. Unfortunately, they lost. Even still, what a joy to get to watch, in HD no less, after an hour or so of a custom roller skating party. Unreal!

Finished Bales
5 Box Beams
5 Window Headers (curved with Blood Lath)
Created Electrical Spike Jig

Day 4:

Another great day. We accomplished a huge amount today. I’ve included a list of the details below, and it’s long. One thing about this house is that it is a two story, and that means working on scaffolding and ladders. In fact, today we set up scaffolds at the end of the day for the West end gable wall. And they are two levels high and we still need to reach up about 7′ to attach the mesh. This building is tall and working on it is not easy because of that fact.

One thing that made the day much easier and safer was the electrical pike jigs that we made. The process of creating those spikes is so much easier, faster, and most importantly safer as a result of the jigs. I’ve included a video of those jigs for you here in the blog. One of the men in the workshop has created a Google Sketch Up file of the jigs and I will post that to the blog as soon as I get it. Definitely take the time to review and build these jigs. You’ll be happy that you did.

Electrical Lecture
Window Counter Flashing
Installed 2 Windows
Pick Up Framing (every day this exists, in fact)
Felt @ Windows and Doors
Tamping
Stuffing
Electrical Spikes Made (34)
Building Inspector Site Visit
Wire Mesh Lecture
Electrical Layout Review and Advice
Foundation Perimeter Flashing
Exterior Mesh 60% Complete
Electrical Installation 90% Complete

Day 5:

A crazy day. We completed a lot of work, but still found ourselves unable to start plastering on Saturday afternoon as we had hoped based on what we have left to accomplish. We are a smaller group, so that’s to be expected, especially with the complexity of the building and the amount of fun we’re having in the evenings! That said, we got a lot done, and we’ll be ready to plaster first thing Sunday morning, I’m sure of it!

Our evening skate parties are just getting better. Here’s a video to give you a taste. Of course, it’s never as fun as if you were there at the time. The reference to the Hungarian Barbarian is to our friend Balint who came all the way from Budapest Hungary for this workshop!

Okay, so I stopped entering information on day 6 and day 7. I was spending most of my nights at the disco roller parties and/or watching the NHL playoffs. The basics of it are that we continued to prepare for plaster and then actually plastered. We premixed 20 bags of plaster on Saturday and let them sit overnight. We then reactivated them on Sunday and plastered like crazy people all day Sunday. We finally finished, late in the evening after dinner. I’ll end this entry with a great shot of the evening experience (yes that’s me in the Wonder Woman Bikini Top!) and another great shot of the house. I hope to see you at a workshop soon! dance partystraw bale house in plastering stage

IPad displaying man cutting strawbales

16 Essential Steps to Straw Bale Success

FREE 16 Day E-Course

Straw bale workshop participants applying cob plaster

Post Comments

4 Responses

  1. Hello Andrew,

    Greetings from Southern Australia. You have been sending me your emails for a year now and I have just completed a local (Australian) straw bale house building course (HuffnPuff) in Castlemaine in country Victoria, about an hour and half from Mebourne, in the south east corner of Australia. Would you ever consider a trip Down Under? My husband and I have just settled on our half acre of land and are planning to build, but have not dates as yet. We are only 45 minutes by train from Melbourne( city of 4 million.) How many people would you need to do the workshop to make it worth your while, or would it be too much trouble with all the different rules and regulations of another country?

    I am sure it would mean a great deal of planning, but a dream always starts with a plan.

    Look forward to hearing from you.

    Kind Regards and love all the recent pics of your workshops!

    Hilary Neylon

    1. Hi Hilary. I’d love to come Down Under! It would indeed take some planning top make sure that the system I teach is plausible; however, that is all manageable. What is a good time of year to hold a workshop, and one that would work with your construction schedule? You can see a list of requirements on my workshop website (www.StrawBaleWorkshops.com) under “Host a Workshop.” In terms of participants, I try to have at least 15 people in the workshop, but I have done them with less. Take a minute to review those and see if it looks like it would work for you. I’m excited to hear back from you and see how to make this a reality.

  2. Hi Andrew,

    I would also consider travelling south(I am in Sydney) to Melbourne to complete one of your Workshops.

Leave a Reply

Your email address will not be published. Required fields are marked *

This site uses Akismet to reduce spam. Learn how your comment data is processed.