Water Isolation Walls

Written By Andrew Morrison
June 14, 2012

hose bib water isolation walls in straw bale houseBelow is another sneak peak at a section of my best selling ebook. This section covers water isolation walls and three commons areas in which they are installed. I hope you enjoy it!

The following is an excerpt from the chapter “Water Isolation Walls” in my ebook: A Modern Look at Straw Bale Construction

Water Isolation Walls

Water is the biggest enemy of straw bale construction. It comes in many forms from humidity to broken plumbing lines, but the results are the same: damage to the bales. Because water is such a major player in the construction of any home, we have to be careful how we intertie the two systems of bales and plumbing. One way is through the use of water isolation walls.

I strongly recommend that you not install any water whatsoever in your straw bale walls. Instead, keep all of the plumbing in interior partition walls. It’s easy to bring plumbing up through the floor and into walls and cabinets. It’s also easy to vent plumbing up and out of internal walls and through the roof. This is the best way to keep your bales safe from water leaks while also keeping your plumbing installation costs low. For example, if a plumber is installing their materials into a straw bale wall, they may charge you more because the process is new to them. If they are installing into conventional materials they are used to, there should be no reason for a price increase.

There are some places around a house though where it’s hard to isolate water lines from the bales. The most obvious are kitchen sinks, showers, and exterior hose bibs. These three locations are not easily moved to interior walls without a major impact on the design of the home. This is where water isolation walls come into play.

Showers and Tubs:

The most common layout for a simple bathroom is to place the lavatory sink and toilet on one wall and the tub/shower unit at the end of the room opposite the door. In fact, modern tub/shower units are actually sized specifically for this installation. This design is very space conscious and is hard to beat in terms of keeping a bathroom small while still meeting code. The problem with this layout is that the tub/shower unit is directly up against the bale wall.

Diagram of shower water isolation wallsThe easiest way to accommodate for this design in a bale structure is to install water isolation walls on either end of the tub as shown in here.
These walls provide protection for the bales from any potential leaks and also allow the tub/shower unit to be placed against conventional materials. This is a good idea as conventional materials can better handle moisture issues, especially if the shower is something other than a precast fiberglass unit, like tile, for example.

By setting the tub/shower back into the plane of the bale wall as shown in the diagram, you’ll also create more usable floor space in the bathroom. After all, if your walls are at least 18″ thick when baled, using a standard 2×6 framed wall behind your tub in lieu of the bale walls will save you at least 12″ of floor space in the room.  A 2×6 wall can provide an R-value of R-21 with the use of simple batt insulation. If this is less value than you want, you can always increase the size of your studs in the framed out area and add additional insulation.

The isolation walls are simple construction as you can see in the diagram. All you need to do is frame two studs from toe up to top nailer/beam on either side of the bale wall and add 1/2” plywood to the side closest to the shower. Another way to frame them is to turn the studs 90 degrees from what is shown here, add insulation into the “stud bay” and place plywood on  the other side of the studs as well. This makes for a smooth bale stop, speeding the bale process by eliminating any need to notch bales around the studs as described in the diagram. Cover the plywood with 30# roofing felt installing it from the bottom to the top so that any leaks will be directed away from bales and down into the toe ups. Once in the toe ups, the leak would be detectable as it drains out whereas if in the bales, it would not likely be discovered until it was too late.

Kitchen Sink:

Most people prefer to place the kitchen sink so that it looks out of a window on the exterior wall. With this in mind, it’s hard to route all of the plumbing through interior partition walls. Fortunately, the water lines and waste lines can usually be run through the floor and up into the cabinet with little concern. The cabinetry can either be customized to hide the plumbing or the pipes can simply be placed near the back where they will remain barely noticeable in the grand scheme of things.

water isolation wall

The problem in this situation is the vent line. In most cases, it cannot be directed to an interior wall because of the limitations of the plumbing code. It therefore must exit the building through the roof via the bale wall. Although it does not carry water, the potential for water damage still exists along this pipe due to the fact that it penetrates the building envelope and terminates vertically outside. If the seal were to fail at the roof, water could make its way down the pipe and into the wall. With even the smallest potential risk, I believe it is worth isolating this pipe from the bales.

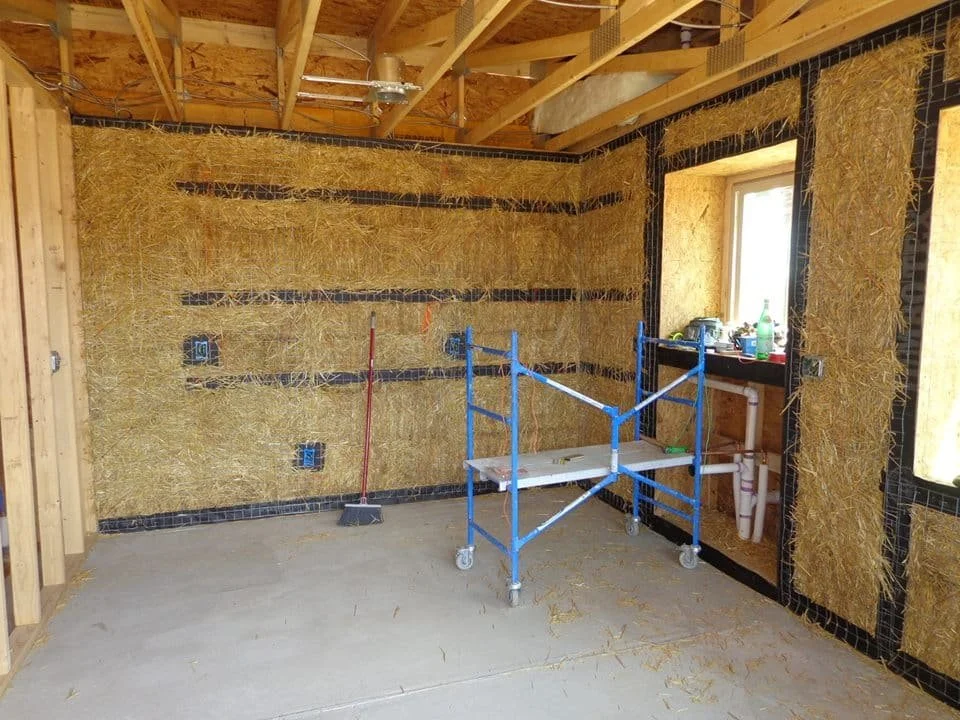
A simple way to do this is to create a water isolation wall around the pipe. With such a small section to cover, it becomes more of a water isolation box in the end. I still recommend providing two bale stops as with the shower unit so that the bales end tightly against the plywood over the entire surface of the wall rather than simply making a thin box to cover the pipe and trying to incorporate it into the bales as you continue to stack the wall. As you can see in the photo, whether one uses only a chase for the vent line or an entire isolation section, it can be framed flush with the bales and insulated to adequately continue the thermal envelope. The framing allows the wall, once plastered, to appear as if nothing is different below the surface.

Hose Bibs:

In every jurisdiction I have ever built in, the code required all exterior water sources that are part of the potable water system to be attached to the house. The only exception is landscape irrigation systems (those are required to be on the other side of a special backflow valve which separates them entirely from the house potable water). As such, we needed to find a way to install a hose bib on the wall of a bale house without risking water damage.

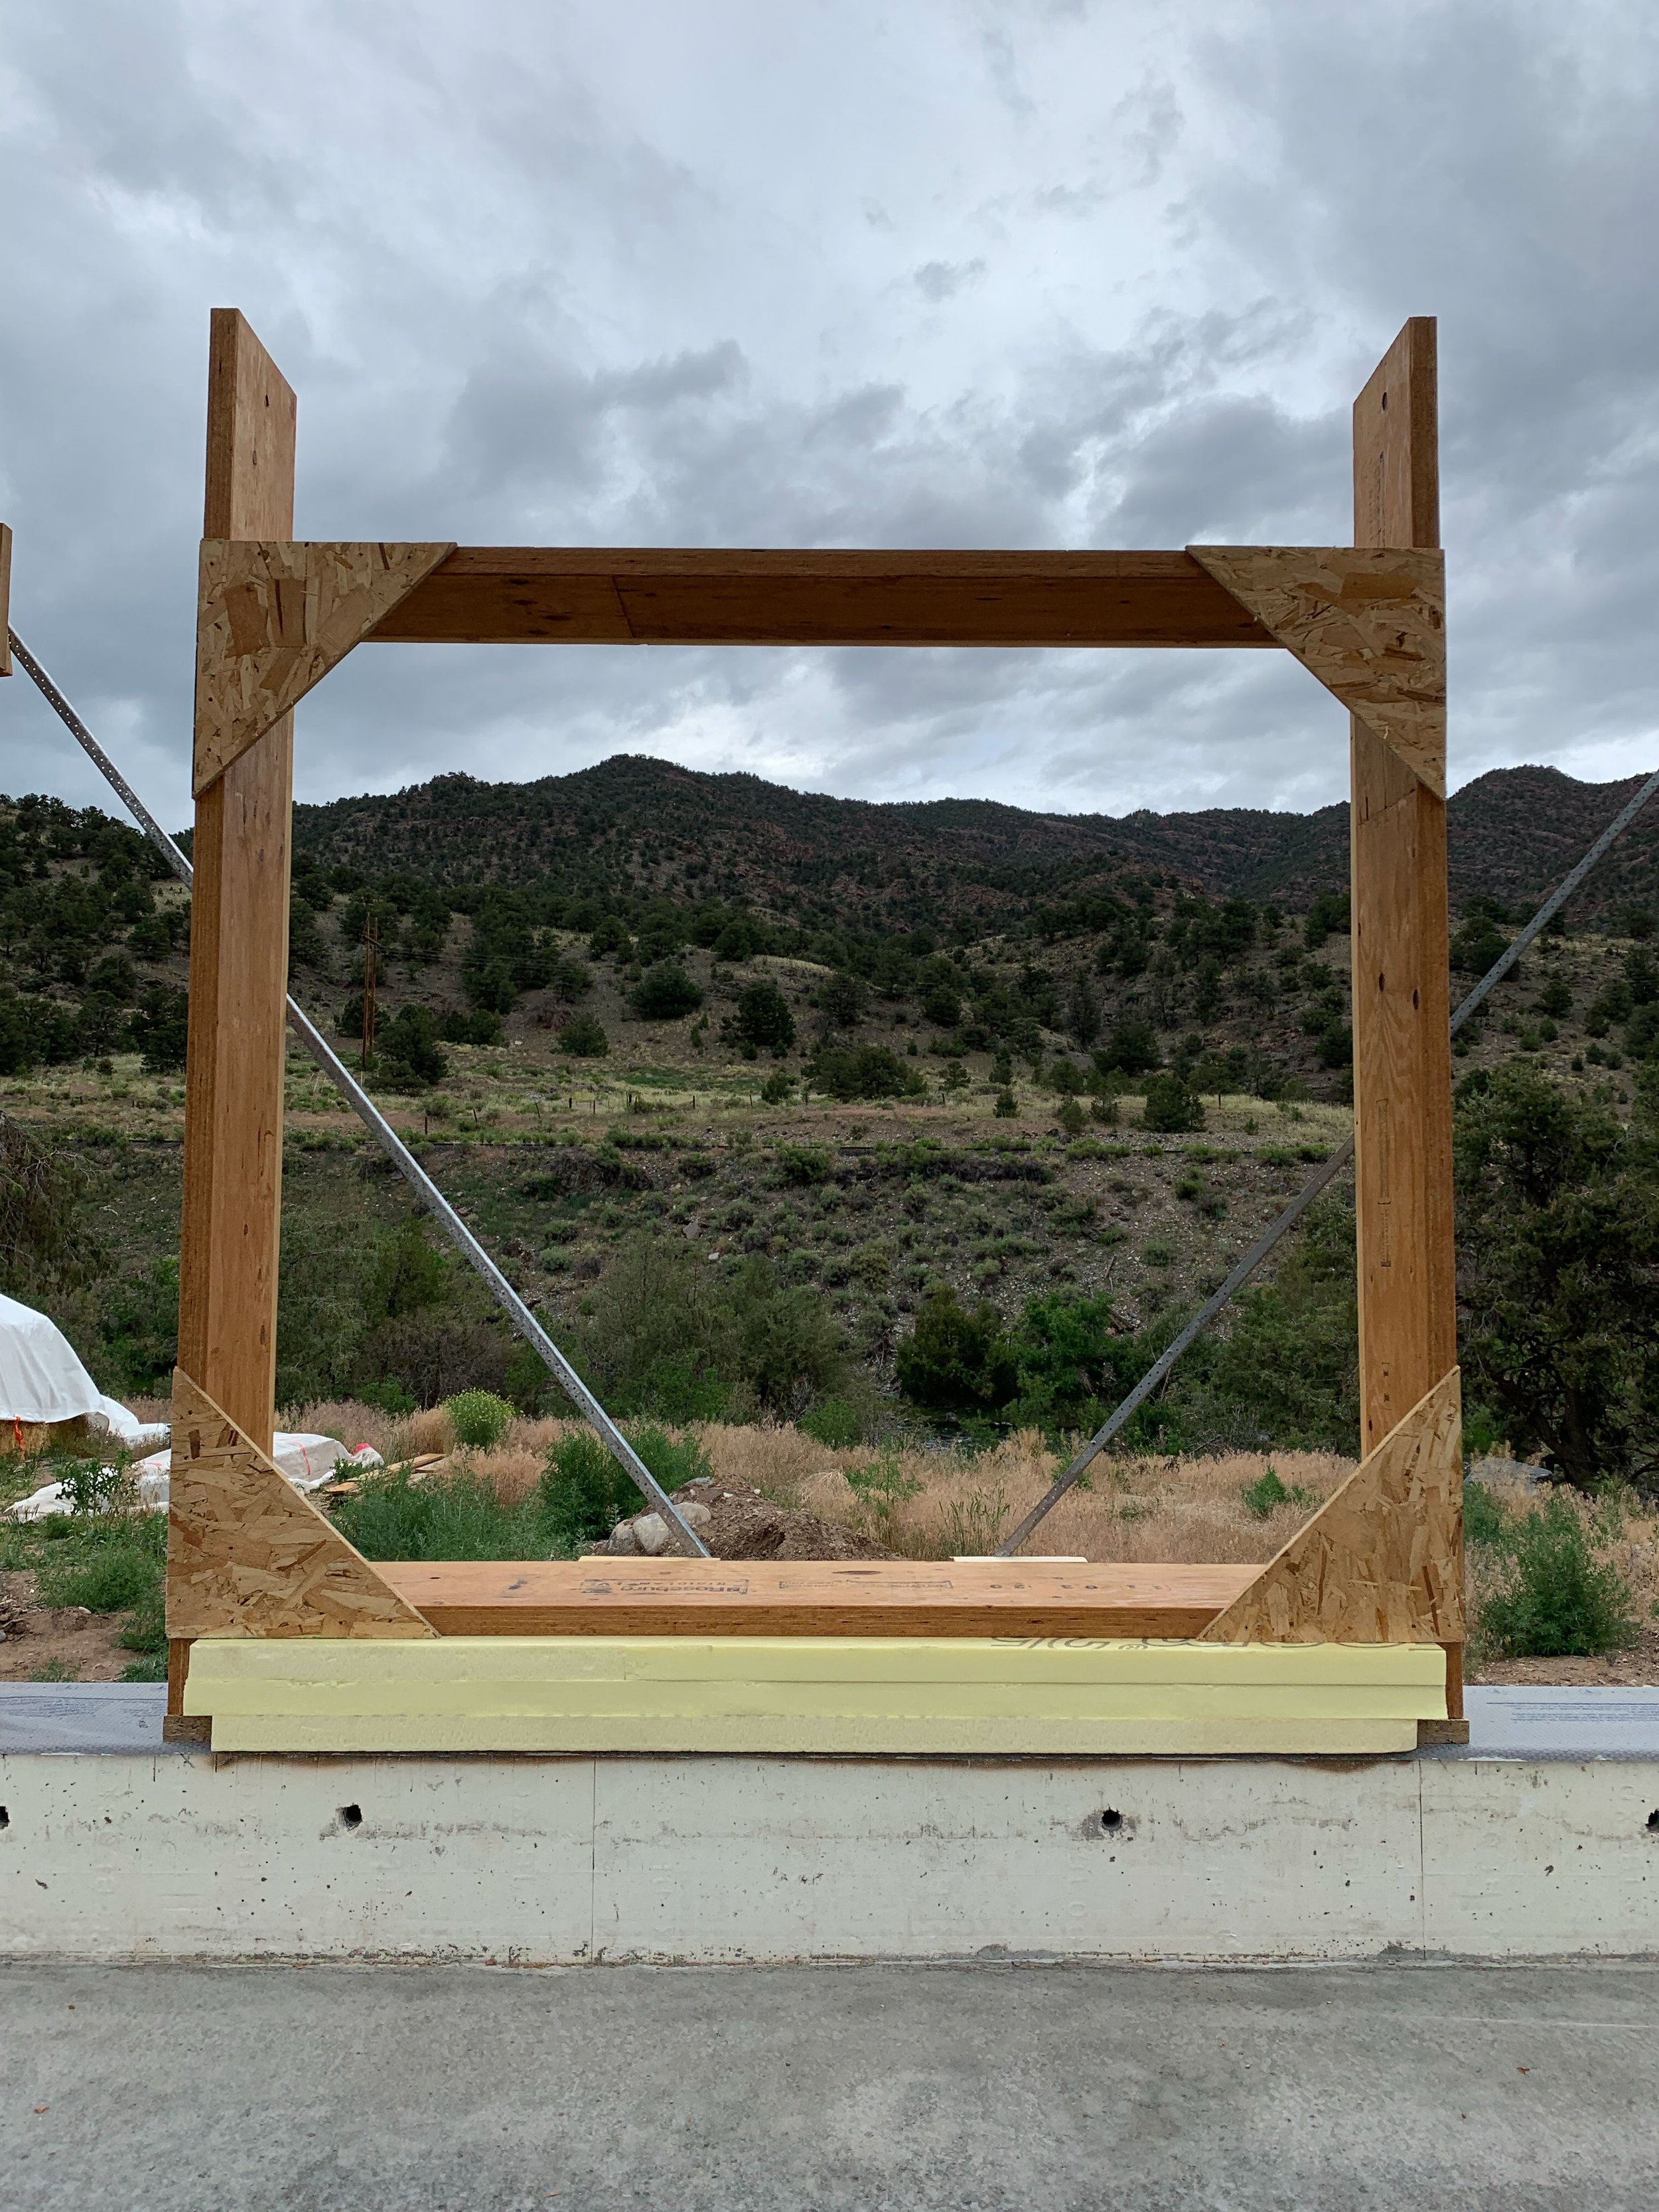
plywood box to isolate water pipes from straw bales in home constructionThe answer was to create water isolation boxes into which the hose bibs could be installed. The boxes are the same height and depth as the bales and are framed so that when the plywood is installed on either side, they are flush with the plane of the bale wall. By keeping the boxes the same height and depth of the bales, they disappear into the bale wall once installed and the second course of bales falls directly above them without interrupting the wall stacking. The width of the box is up to you; however, I suggest you provide enough room for the plumber to easily install the hose bib fittings. This, once again, keeps the cost of the plumber down as he or she is technically still working under “normal/conventional” conditions.

Be sure to wrap the inside of the box with 30# roofing felt as well as the outside to provide superior protection from leaks. Because the box is as deep as the bales, there is plenty of room for insulation and the thermal value of the box will not have a negative impact on the overall wall. In fact, it may be even more insulated depending on what materials you use. In addition, the depth of the box allows for the use of frost protected hose bibs, which even if not required by code, are a good idea.

Want to learn more about straw bale houses and how to build one? Want to do so for FREE? Sign up for our totally free 16 Day Straw Bale eCourse! Find out more HERE.

IPad displaying man cutting strawbales

16 Essential Steps to Straw Bale Success

FREE 16 Day E-Course

Straw bale workshop participants applying cob plaster

Post Comments

7 Responses

  1. I love straw bale. I had not thought about water isolation walls before. Last night I was reading about spray polyeurea techniques and its use in waterproofing. Its becoming more commonplace. I see that it could be perfect for straw bale construction. It may not be green enough for some; but in the instance of the hose bib box it could provide water tight installation – for life. Also in areas on the exterior that are more exposed to weather – this stuff could really waterproof the bales. Its much like what is used in some spray applied truck bed liners.

  2. Very timely; I am about to infill bale some north walls that have vent and waste lines installed just to the inside of the inner 4×4 curb rail, meaning they will be 3 1/2″ deep in from the finished inner plaster face.

    Due to how many and spread out the pipes are, complete isolation would result in omitting a huge portion of the bales in my cold North wall. Like Evan I was also considering applying 1 1/2 to 3″ of closed cell polyurethane foam to the pipe. This foam is considered impermeable at 3″ thickness. Then I would install the bales, overnotching around the foam-wrapped pipes. The void between straw and foam would then be cobbed in with clay and straw as part of wall prep. That way, the cold pipes that are essentially outside air in your walls just waiting to condense would be insulated with a fairly water resistant coating, and then wrapped with clay that connects it to the inside clay plaster, to dissipate any potential moisture back to the inside atmosphere. Then again I wonder if it would be o.k. to just cob it and skip the foam? Any thoughts on alternate isolation approaches that still allow the marriage of bales and plumbing?

    Though not as watery but equally a cold air condensation concern, this same question applies to other through-wall ducting especially range and bathroom exhaust venting. (I live in cold maritime Homer, Alaska.)

    One 3′ swath of north wall has three vent/waste pipes running vertically, so I was already planning on omitting bales there; nice to hear you advocating this approach, Andrew. I was thinking of lightly framing in a box to the outside of these pipes so that I could staple up a blown-insulation fabric or possibly tyvek and install 12″ or so of cellulose at the same time I’m filling my lid. (There’s already plywood on the exterior in this location.) The pipes would then remain exposed to the inside of this cellulose pillow, to be finished on the inside with removable paneling or be incorporated into shallow cabinets/closet. Once again the question of condensation arises.

    (“Bales only where they make sense” has resulted in omitting more and more bales from my building. Sometimes making me wonder if all that supplemental wood framing was worth it for a single course of bales below my large south windows, for instance. Clearly delineating where bales do and don’t make sense at the outset of a project would help avoid a lot of waste among bale builders, no doubt. I’ve discovered hybrid approaches tend to be the most practical, though requiring extra consideration and builder knowledge and flexibility. Why should every wall be made of the same exact material when your requirements of it are drastically different?)

  3. Hi Andrew:
    I read your information about watertight conventional construction walls and had a question- have you done this long enough to see if there is plaster cracking at the seams where one construction type meets the other? It seems like this might be the case since there will be different reactions to moisture content with the straw vs. wood-one might expand or contract more than the other, causing cracking.Let us know. Thanks!

  4. I think when we are planning to have water line isolation, we need the expect people so that it will be properly done and so that we will spend budget in one time only.

  5. Hi Andrew. I read the first comment from Evan, and remembered reading about Tyvek® application in fluid form. It is on the Dupont® website or here is a link to the information in a pdf : http://www2.dupont.com/Tyvek_Weatherization/en_US/assets/downloads/pdfs/CON16324_FA_Brochure_Horiz_me01.pdf

    I wondered if this material in a spray form would work well to water seal the strawbales while allowing the all important vapor passage to occur. Could the bales then be finished with more easily available/installable materials such as sheathing/ siding? I would love to know if anyone is willing and able to try this–or has already done this. Hydraulic lime plastering seems like such a challenge to get right, even after buying and watching your videos.
    Thanks!

    1. Thanks Ryan. I have not heard of this product before. I’m initially reluctant because it is from DuPont and I don’t exactly consider their products to be Green, even when they claim them to be. That said, I have not researched the product at all, so my initial judgment is exactly that, a judgment, not anything backed up with data. I’ll look into it… Thanks for sharing.

Leave a Reply

Your email address will not be published. Required fields are marked *

This site uses Akismet to reduce spam. Learn how your comment data is processed.